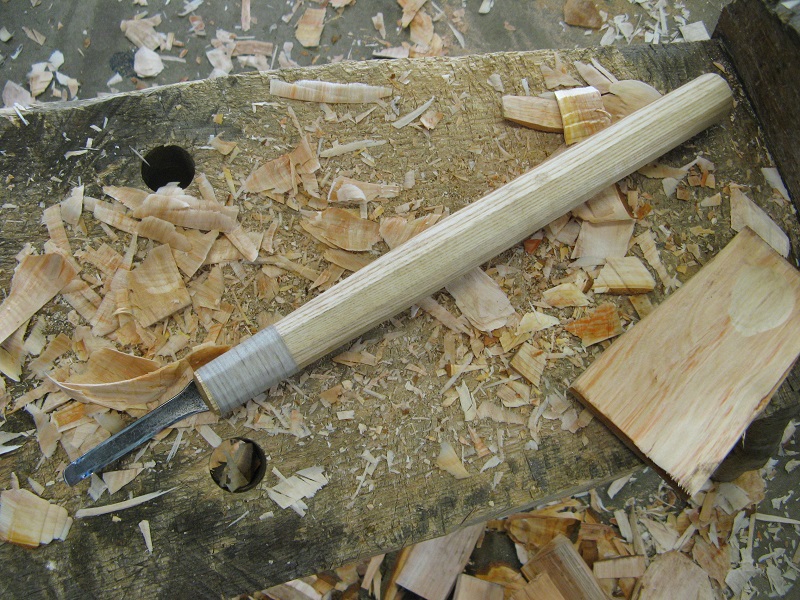
Which is the best way to orient the grain?
In my last blog post I wrote about grain orientation in carving axe handles, making the assumption that having the rings running parallel to the bit of an axe (1) would be stronger, however speaking to Lee Stoffer about this in December sowed seeds of doubt in my mind. I found lots of research on the effect of sloping grain on timber ( when the grain is not parallel to the to the cut timber) . A figure that stuck with me was that a 10 deg slope reduces shock resistance by 50%. I measured the slope on some handles I had rejected and found a slope of 20 deg. The most applicable research related to baseball bats, this paper suggested that grain orientation makes no difference to strength in non sloping grain. However there was a statistically significant difference when slope of grain was added into the equation. Interestingly the stronger orientation in ash was different to that found in birch and maple. Unfortunately no figures were given. However this research suggests a 25 degree slope of grain would reduce strength by 60-80% ( I am fudging here, toughness, modulus, compression, shock resistance were all measured, giving for a very confusing graph)
The plan was to test some sections at 25deg slope, very much a worst case scenario. the sections would then be tested in both grain orientation. I cut slices 1cm thick from two pieces of ash from my woodpile one with approximately 12 rings per inch/ 25mm and a second with 6 rings per inch. The slices would then be cut to make 1cm x 1cm cross sections. Some 1cm square non sloping sections were also cut to give a baseline measurement.

The plan was to compare the strength of these different sections, I was going to support the sections a set distance apart on my digital scales, then slowly press down on the centre of the section and record the maximum weight recorded before the section broke.

Unfortunately the scales bottomed out at 30kg, and at this weight the sections all held. I put them on my belt sander and reduced the section to around 6mm. This thickness meant that most of the samples tested from the slower grown ash broke at around 15kg.
I have struggled how to describe this grain orientation, radially/ Tangentially, Vertical/ Horizontal? Edge and face loading was used in the baseball bat research. In terms of axe handles I think annual rings parallel to the bit of the axe – (1) or perpendicular (2) work well but again a picture is clearer:

Results:
Put simply, taking 100% to be the non sloping baseline tests.
In slower grown ash: Orientation 1 gave 98% strength, and 2 gave 89%
In fast grown ash: Orientation 1 gave 41% , 2 gave 27%
However the fast grown was almost exactly twice as strong in the baseline tests. So the figures aren’t quite as far apart as at first sight.
The difference is significant though , also the sloping grain samples broke with virtually no warning in the fast grown ash, whereas there was noticeable bending and creaking in the slower grown samples. At 25 degrees slope a handle would have been stronger if made from the slower grown ash, however as the angle decreases then the point will come that fast grown ash in orientation 1 will be stronger. In a straighter handle the fast grown ash will be stronger in either orientation.The increased strength in orientation 1 also ties in with the baseball bat research I came across.
These results ( see provisos at the end) are interesting, in a curved handle if I can’t use any natural curve in the grain to my advantage then I will be using fast grown ash with the annular rings parallel to the bit of the axe (1) If I wanted a really curved handle and had to make it out of straight grained ash I would choose slow grown ash over fast grown, a chain being only as strong as its weakest link.
Provisos–
This was only meant to be a light hearted test done over the Christmas break, my children helped break the sections . However my training was in similar sorts of research and I am very much aware that the sample size of this test (24) is too small. I hope to continue with the tests to see how repeatable these results are, in the meantime other related issues include:
1. I have included odd spikes in the data to get averages, these should have been ironed out with a larger data set.
2. It is also very difficult to start with a grain aligned at 0 deg, the slower grown wood had definite twist in it. Again this error should be reduced with a larger sample size.
3. The fast grown ash actually bottomed out the 30kg limit on my scales on half of the aligned samples, I estimated breaking force in these cases.
4. I am not certain that the results from the small sections that I have been testing can be extrapolated to axe handle dimensions, instinctively I would say yes, but at any rate the sections used are not that far off spoon dimensions, which may well be of interest to a wider section of readers.
5 Lastly, is breaking weight/ force a good test to replicate failure in an axe handle? probably the Izod impact test would have been better but beyond me or my young assistants.