Archive | 2017

Postage and Packing

There are new postal rates coming out in the UK in October and this has prompted me to revamp the P&P charges on the site. Due to past difficulties in managing stock, customers often could buy only one item at a time and ended up ordering multiple times. Acknowledging this I made my postal rates as low as I could, and as a result often ended up paying more for the stamp than I charged for P&P to the customer, but on balance it worked out OK.

Now that Don has sorted out the ordering system the dynamics of the orders I take have changed again. I am seeing Increasingly larger orders, I did increase the flat rate charge but this made it expensive for customers that only bought one item, and with the recent addition of axes to my stock list the larger orders can still be close to double the P&P charge I make

Again Don has been able to help with this- So taking into account the new postal charges we have been able to work out a new system, depending on where you are there is a base rate- which has been reduced in most cases- if you only order the smaller blades this is all you will pay. Heavier items such as Axes, Gouges and Twca cams may add to the this base rate to come up with the final postage figure. I am not going to put up the loading that each item has, not because it is secret ( you can look at the postage charge at checkout anytime and see what you would be charged) but because it is complicated, varies region to region and due to the odd hikes in charges at different weights it isn’t intuitive. However it looks like it will be a much more equitable system, and if it turns out not to be, I will tweak the figures again.  My aim is to make and sell high quality tools, not make money from postage.

Axe Handle

Some of my earliest ever blog posts concerned axe handles and handle geometry; surprisingly on re-reading them I was not cringing as much as I though I would, I still stand by pretty much all I put those posts. However, after starting to sell heads it seems to be time to put up a post detailing how I put a handle on an axe.

I will give you the dimensions that I have used on this head- which is a prototype for the lighter head that I alluded to in my last post on axes. However I would strongly advise that nobody sticks slavishly to them, this handle fits my hand and my swing. Your hand size may well vary as will the optimum swing for you. I have quite a few axes and have tuned the handles so they all swing the same, this makes it easy to swap on for another in the middle of carving and be able to work accurately right away, without having to dial in on each axe. My heads are not cheap and I assume anyone that buys one will have an axe already, as long as you like it I would recommend making a handle for my head that will mimic your original one.

The other thing I always advise people that buy a head from me to do is to make the first one out of green wood- the reasoning being unless you are really experienced at hanging axes you are likely to a) not do a fabulous job b) spend ages doing it, especially if it is seasoned hardwood c) want to keep it on using it, despite a) and because of b) .

So, make a crude handle out of greenwood- you know it will eventually shrink so you can’t get attached to it, it will be easy to shape and it will give you a chance to dispassionately swing your axe head, make some spoons ( or whatever takes your fancy)  and know what you want to change. Either way the processes are the same.

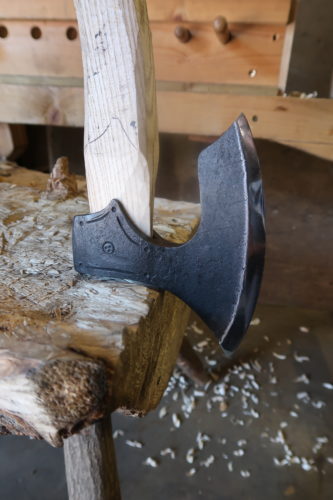
This was my starting point.

Rather than carve out a green handle each time I have accumulated a selection of handles that I can try out on the head- the long wedge secures it. My best guess was fitted, although I knew it would be too long. The one above it was more curved, the one above that considerably less. The two billets for the handle were split from some fairly small diameter ash, – it had been cut a few year ago and had been in my workshop over a year but had been kept in the round albeit with a huge split down it, so was pretty dry but still quite nice to work.  I marked out the blank I wanted to cut from it, this was split out with a froe- and I managed to get a hammer handle out of the waste on each side.


I then used the axe to hew it to a rectangle, it quickly became apparent that the handle I had selected didn’t suit so I fitted another. I like quite a large palm swell on my axes, this does mean that the blank you start from needs to be quite thick.  The squared off blank  was  380 x 75 x 42mm

I then drew out the profile I wanted, and cut it to length, a couple of stop cuts make it easier to shape the end. An axe is not the easiest way to do this,  band saw and linisher is probably the quickest option, but all the time I was learning about the axe I was going to handle ( and admittedly the more I used it the less options I had to change the design of the handle which is why I recommended carving some spoon banks rather than jumping straight into the final axe handle)

You need to allow a bit for shrinkage- only a few mm if the wood is quite dry as this was but if it is green it is surprising how much it will shrink, which is what happened to the temporary handle I am using- it was prefect in the hand when green but ended up too thin when dry, so was consigned to my test handles box.

I then draw on a centreline- and take it down in the other plane. I also do some rough shaping of the corners especially on the butt- I feel it makes it less likely to split if you don’t expose a mass of flat end grain.

At this stage I let if bake under the windscreen of my van for a week. I weighed it and have checked the weight loss periodically, when stabilised I  could carry on. This happened  in 4 days, it being uncharacteristically sunny in for this time of year in Wales.  Also if possible I like to do my woodworking on a Monday, after a few days out of the forge my hands tend to be clean enough not to make a complete mess of the pale ash. I have marked out again where I expect the head to end up, you can see there is quite a lot of excess- this is intentional and makes fitting the head easier.

I carved down the handle to get the head started, until the handle is protruding it is better to knock it on like this. Use a wooden mallet and make sure you have the corners removed on the butt so you don’t chip off any sections of short grain.

Next you want to check the alignment as it goes on, it is in theory pretty obvious where you need to remove material to sort out issues but I find it much easier to mark it out the areas I need to remove material from whilst the head is still on, mistakes can be made and you can’t add wood. In this case the head needed to be rotated a few degrees around the handle, I marked the area, on this side above the lug, on the other side below. The block I am holding is used to remove the head at this point, it is a loose fit in the eye but almost round at the other end. A few gentle taps and you can feel the head moving out, this is pretty safe although I would advise taping up the edge. However even with the head taped up there are dangers.

You really don’t want to hold it like this. I once made this mistake when knocking out a hammer handle, one huge blow on the tool and the handle went flying out and hit the floor, the handle removing tool was driven deep into the eye and wedged in. Unfortunately it had also caught the web of skin between my thumb and forefinger. I was now trapped, had to go next door with a hammer head dangling from my hand and get them to drive a drift in from the other direction to free me,  luckily only lasting damage done was to my pride.


To start off with you want to make largely straight cuts, go a little at a time and keep checking the eye is going on straight, rationally and also that the edge is following the centreline of the handle. You should reach the point when the end sticks out pretty quickly. Don’t worry about a perfect fit at this point, all you are really aiming to do is get the eye on straight- you will remove this section finally.

You can now knock the eye out much easier- I still tend to hold the head a make a series of progressively heavier hits until it starts moving.  You can then make adjustments and knock it back on like this.  You can see at this point the head has to move up well over a centimetre.  If you hold the head and knock it up the weight of the edge will tend to make the head rotate so the beard is moving closer to the handle. You can steer the eye on to some degree like this. The wedge I use will expand the handles thickness,  so it is OK to make the handle a bit thin, however do be careful of to much off the width as this is not really something that you can correct. It will still stay put but an air gap top or bottom doesn’t inspire confidence.

As you start blending in where the handle meets the lugs I find you need to make a cut that scoops out a slight concave, a draw knife will tend to cut in too deeply, I find the much maligned thumb push prefect for this, as it tends to cut the right shape naturally, admittedly this is a better shape for rounded lugs- pointed lugs would benefit from a more complicated V – cut out, in practice though this feel fine in the hand.

As the head progresses up the handle you can see the points of contact as the head marks the wood, I remove these each time the head goes up the eye as it is tapered in this direction. for greater clarity I rubbed some black ( moly) grease inside the eye before as I approached the final fit. This gave me an idea of the amount of contact I had achieved.

This was pretty good, as the wedge would take care of the other end. I then trimmed the end down and  cut the slot for the wedge. Here you can see the concave section I was talking about, not very easy to do with a drawknife. I have actually shaped the handle at this point, but would recommend cutting the slot before final shaping- you can then put the handle in a vice with no fear of marking the handle. I saw slowly and make sure to go right down the centreline, aiming to cut to between 2/3 and 3/4 of the length of the eye. I make a cut as this stops the handle splitting to accommodate the wedge, these splits become apparent when you take the handle off (which is the point of this method of handling- or at least having the option to)

Shaping the rest of the handle is next, or should have been.  I tend to rough out the four main flats with a drawknife.

I then refine with a knife and even spoonknife for the concave sections.

I like 12 sided, octagonal looks good but can feel a bit sharp, with 12 sides you can keep the facets crisp but still make a comfortable handle.

The optimum circumference of the handle is dictated by the size of  your hand. I used to play a lot of badminton, all quality rackets were sold in different grip sizes but players still would fine tune between this sizes with wraps. If you have gone to small on your axe handle wrap of suede is a great way to build up a grip. It is personal preference but a starting point is your fingers just touching your the ball of your thumb. There is a good case for saying that as you are going to be moving your hand up and down the handle of the axe as you carve that the circumference of the axe should be constant along its length. In practice I think this looks a little odd so do opt for a slight taper. When you are holding an axe short you tend to grip it looser than when you are holding it long and doing full blooded swings anyway.

When I am happy with the handle I will cut the wedge ( although there is no reason why you couldn’t do this after cutting the slot ) I used some dry oak, and roughed with an axe and finished with a knife. I have never measured the slope of a wedge, aiming for about 6mm where it will be cut off. I make sure the width of the wedge corresponds to the width of the eye not the handle, which despite your best efforts may now be slightly undersize.  As a test I drove the wedge in then removed it.

You can see how far the wedge went in as the oak has been grooved by the pressure from the ash. You can also see how the head has now been expanded to make nearly full contact along the eye. When forging these heads I also reverse drift to put a slight taper in that the wedged section can expand into, in this way the head can come loose but still not fly off. however to be really safe I also leave about 5mm of handle exposed, you can see how the head has formed a step here- this is a measure of how high wedging forces are. Don’t oil a wedge with BLO, this just lubricates it to the extent it pops out like an apple pip between your fingers as you try and drive it in, comical the first time, but ultimately a little frustrating. I then lined up the wedge with the slot and drew a pencil line at the point that the wedge would bottom out. I drove the wedge in again then trimmed it and bevelled the edges hopefully to stop it splitting. at this point you can drive it in a bit further if you wish as it is more rigid being shorter.

I find this style of wedging really useful, having it long allows me to take up any slackness, but it is simple to put the wedge in the vice to remove it ( and yes you can just see that I cracked this in two, a first for me, I will probably replace it when I take do finally take it out) When the pencil line reaches the handle you know it is time for a new wedge rather than trying to drive it into the bottom of the saw cut.

Earlier on I mentioned making an axe swing the same as another one you have, one way of looking at this is comparing the orientation of the handle to the eye. On my axes I like the eye pointing up slightly as this tends to make them slice as opposed to chop.

If you come to fit a head it is useful to know the orientation of the eye to the edge- this will effect the handle shape needed to give the swing that you want to achieve. I try and forge my heads so the eye is pointing straight backwards, but they do all vary a bit. If you buy a head from me I will send a tracing showing the eye orientation of your head, here is how I check- with the drift it was made on.

A lot of this is down to personal preference, I  simple formula I have found that works aesthetically  when marking out a handle is to divide the section behind the lugs into thirds and aim to put the point of inflection ( where the bends change direction) at these points. I have also found that having flare on the top of the butt 30mm further back than the one at the top feels better.

I tend to use ash, but most hardwoods are suitable, carving axe handles are pretty under stressed. As to oiling the head- some thinned Boiled linseed oil is my choice, then when that has dried a top up of neat BLO whenever the handle looks like it needs it.  Apologies for the  length and depth of this post- I was going to provide these instructions to all my customers that have ordered axe heads but it seems easier to put it up here.


Keeping the elephants away – part 2

I have now processed the results of my sets of experiments and even found time between grinding to conduct a new one. To recap though, I wanted to see if there was anything you could soak a loose axe handle in to swell it sufficiently to fix it.  I tested Veritas chair doctor glue, Water, PEG, Boiled linseed Oil and thinned BLO

I will start off with the Veritas Glue- This worked to a degree but running any glue that is thin enough to penetrate between the handle and axe would also work. I could find no evidence of the wood actually swelling, but then I was not using the glue as intended. You can see from the picture that the glue did not penetrate very far and rusted the socket. Gluing is not a method I can see myself using as I like to be able to disassemble my axes so leave a protruding wooden wedge.


Water-An average of 4.1g soaked into the wood. This swelled the wood massively, but in drying the wood had been crushed by the swelling and were so loose that they could be rocked in the socket. You can see the constriction here. So not a long term solution but in an emergency it will temporally secure a loose head. It was interesting to measure the differential expansion coefficient- this came out at 2, the Ash moves twice as much tangentially as radially.


PEG-  This didn’t work as hoped. The wood swelled, but as it dried it shrunk back, it was slightly looser than before. Ideally PEG should be applied to wood that is green and if using dry wood it is recommended the wood is soaked for a few days to rehydrate it, this allows the PEG to penetrate the wood better, it was very viscous and the amount absorbed by the wood was less than for the thinned Linseed oil at 1.8g.  I don’t see that soaking a loose head in water for three days and then soaking it in PEG a realistic idea. I wouldn’t like to leave my axes submerged and rusting for the best part of a week.

BLO- The immediate swelling I expected to see did not occur, however as the oil cured it should gain weight by oxidation- in theory a weight gain of 40% is possible in raw linseed oil, somewhat less in BLO due to the added driers. A gain in weight suggests an increasing in volume that I thought may give rise to the swelling that I was hoping for, so I have been recording weights for the last few weeks.  This was not found, despite using scales that weighed to one hundredth of a gram, no consistent weight gains were recorded. Changes due to humidity were recorded in all samples and it was found that these changes were less in the BLO samples- the oil reducing the flow of water vapour from the air to the wood.

Thinned BLO- Broadly the results were the same as BLO, I found it interesting though that significantly more oil was absorbed even taking into account that some of the initial recorded increase in weight was just the white spirit used to thin the oil 2.1g of thinned oil went in equating to 1.7g of BLO as opposed to 1.2g of BLO if it is not thinned ( It should be pointed out that it is likely that the BLO I was using had some thinners in to start off with, but I was amazed at how much thinner the oil was with 20% whites spirit, I would guess that there was 5% or less thinners in the ‘neat’ BLO).  This seemed to evaporate off quite quickly. It does seem to be worth thinning BLO not only will it penetrate deeper but more goes in as well. However in splitting the samples open at the end of the tests it was apparent that not all the white spirit had evaporated off- it could be smelt easily. It can be seen how the Thinned BLO penetrated the ring porous sections of the Ash.

So not the set of results I was hoping for, but I remembered reading that wood treated with BLO resisted compression better as the fibres were filled and less likely to collapse. Perhaps this means that if the wood gets wet and swells it will resist being crushed and then shrinking on drying as seen in the water samples?  Also the Axe will transmit force to the eye- these concussive blows may dent the wood allowing the head to come loose.  However in the axes I have used it tends to be periods of storage that cause heads to loosen rather than use, but then I forge my heads with a larger contact area than many reducing the pressures on the wood.

I didn’t have time to run a series of tests to see how the samples fared against compression over time, but I did set up a test imitating the concussive forces that an axe or hammer might impart to a handle.

Not the clearest picture I am afraid but we used a bar of steel that was held a set distance above the samples ( by the box section that also guided it down onto the target peg)  We dropped this three times onto the samples radially and tangentially then measured the degree of crushing.   We tested BLO samples against some control samples I had kept for such eventualities.

In these samples we found that they were crushed much more radially- the growth rings more readily crushed into one another, not really a surprise if you have every tried pounding ash splints.  Tangentially  however the depth of crushing was roughly half.

In BLO loaded samples this effect was not seen, the tangential crushing was reduced slightly, meaning it was slightly stronger. However the real surprise was the radial strength this was now equivalent to the tangential strength.It seems that the BLO filled the pores of the ring porous ash and reinforced it at this weak spot. No statistical difference was seen between the thinned and uncut BLO despite the thinned seeming to have penetrated more readily.

So what did I learn? Well..

Soaking in water is as bad as thought.

PEG and Chair Doctor glue don’t work.

Boiled linseed Oil didn’t work as expected- there is no point soaking a loose head and expecting it to swell and tighten up; however the wood does seem to be slightly more resistant to moisture after oiling so will move less after treating. Ash will also see an increase in compressive strength after treatment that may help it to stay tight in a head. Thinning BLO allows more to go in, reducing the soaking time needed. Probably better to use it neat for a final coat though. BLO is not the cure all that I hoped it to be, but out of all the samples tested is was the best.

As many of you will know Don now does the IT support on my site, and is very knowledgable on the subject of Linseed oil, we have been communicating over the last month or so, it was he who confirmed the idea the the oil should gain weight as it cures. I initially found great comfort in this, I had made an axe stand from some oak years ago and as some of the sapwood had rotted, so I poured litres of BLO into it, the idea being that it would soak into the punky wood, cure and harden it. It didn’t work like that, 15 years later bits still flake off and leave oily smears as it still hasn’t fully cured. I had increasingly found that this stump wasn’t so easy to lug about and had been putting it down to encroaching old age, so the idea that the stump was still getting heavier as the oil cured was encouraging. With these results though I am afraid I have had to revert to the previous theory.


Keeping the elephants away


A man boards a train, and finds himself sitting in a compartment opposite another passenger who is reading The Times. Every time the other finishes a page, he tears it from the paper, rolls it into a ball and throws it from the train. Perplexed, the man asks what he is doing.

“Ah,” says the man with the newspaper. “A trick I learned in Africa. Keeps the elephants away, don’t you know.”

“But there aren’t any elephants around here!”

“Yes. Works well, doesn’t it!”

Nearly twenty years ago when I was an Artist Blacksmith I found myself in Paul Zimmerman’s forge in Germany, I was impressed as to how well seated his hammer heads were compared to mine, and was told that every Christmas they would soak all their hammers for three days in linseed oil, this would swell the wood and hold the heads on. This made a deep impression on me, not in the least that Christmas was the only time they took a break long enough to complete this process.

When I returned from this trip I set up shop more professionally, soaked all my hammers and have not suffered loose heads to the extent that I used to; forging hammers have a tough life, they often get hot from contact with hot steel, often enough to expel uncured linseed from the heads. But in my new shop the process seemed to work and I have used the same process on Axe and Adze heads with similar success. Or have I ? my new shop is much less damp than my old one, maybe the heads would not have come loose without a soak. In a similar vein I have heard and repeated the idea that soaking a handle in water is a bad idea as the fibres will try to expand greatly to the extent that they will become crushed and on drying the handle will be a worse fit than before.

Is this true though? can the fibres expand and become crushed at the same time? Yet another version I have heard is that in Japanese woodworking if an irregularity is found in the socket of an axe head the corresponding area in the handle is peened down and then carved to make as good a fit as possible, the handle is then fitted and water poured down the handle/socket junction. This soaks and expands the compressed wood which then pops back into place locking the handle on. Yet would soaking the handle not make it swell, compress the fibres and then contract on drying and come loose? It is said that if something is repeated eleven times on the internet it becomes irrefutable fact, but it is hard to know which facts to believe sometimes.

Heads coming loose on axes and adzes, especially where the contact area is relatively small because the eye socket is quite short- such as the Chineland pattern axes is something that comes up fairly frequently, even in my workshop I have had students bring along such axes for attention.

A slight window in my schedule gave me the few hours I needed to finally put in the time to continue a series of experiments to address some of these questions. I had made a tentative start over a year ago and then as ever work took over. But I am finally on track again. The full cycle of these including wetting and drying cycles will take around a month to complete and will be quite long winded. I will document results as they progress partly because I am uncharacteristically excited by this and want to share the results, also there is quite a lot to get across and it seems to make sense to break it down a bit.

To start off with though I  had, last year,  rough turned some ash blanks in the workshop, these were now skimmed in my metal lathe to be an accurate fit in some 25mm tube I have.

These  blanks were then cut into sections as were the tubes. They were then weighed and measured ( unfortunately my lathe was cutting a very slight taper) then driven into the tubes with a few very light taps of the hammer. This replicates an axe/adze/hammer handle as it would be fitted in my workshop. These tubes were then left over a radiator in my home and tested again. Unsurprisingly they had come loose to varying degrees, again replicating a common problem.

The next stage was to soak these test pieces in various solutions to try and fix them, I used the following:

Water- will it get even looser after drying?

PEG – polyethylene glycol- this was used quite commonly in the woodturning community a few years back but seems to have fallen out of favour somewhat now, it was quite hard to source. The idea is that the PEG will saturate the wood like water but will leave a waxy residue in the wood, reducing shrinkage, and in the case of woodturning it will lubricate the tool cutting it leaving a finer finish, check out Wiki for its other common uses.

Veritas Chair doctor glue- ‘ If a chair has a loose rung an injection of Chair Doctor Glue will first swell the rung and then bond it in position. The secret is the low viscosity. It soaks into the end grain, swells the wood then ‘freezes’ the wood in its swollen state as it cures. A film of dry glue is left on the walls of the wood cells preventing contraction. ‘ – sounded like it was worth a go, so a bottle was purchased.

Boiled linseed oil- My usual choice, rather than test different types of BLO I also tested a sample cut with 20% white spirit to thin it, hopefully allowing increased penetration. Accepted idea is that the oil penetrates and wets the fibres which then swell, and stay swollen as the oil will not evaporate out of the wood.

I used two samples in each solution- trying to match one loose and one tight fitting in each pair. They were left to soak for three days, replicating a German blacksmith’s Christmas break.


I didn’t soak the Chair doctor glue pair- just added some to the end grain at the end of the three days- these seemed to glue solid into the tubes.

After the soak weights and measurements were again taken, but the most obvious thing was that the water and PEG soaked pairs were now rock solid in the tubes and the protruding ends were noticeable oval. However all the BLO samples were as loose as when they had gone in, the oil actually made them slide in and out of the tubes easier. At this point I did wonder if all the time I had spent soaking tools in BLO had been a complete waste of time, maybe the only effect was to reduce the rate at which moisture could pass in and out of the wood as atmospheric conditions changed? Still I wanted to complete the experiment and see how the water and PEG samples dried so have been completing the weights and measurements on all the samples over the last couple of weeks as they dry or cure,  I should have final results completed by next weekend, so far they have surprised me.


Axes, finally

For years now I have been telling customers that I would be adding axes to my site in the near future, well finally that day has arrived! When the next round of orders come up there will be a carving axe head available to buy.

I have finally refined the design to a point that I am confident that I will not suddenly feel the need to change it, I do love to tweak designs like this, but after at least a couple of years of trialling the many prototypes I am happy with where I have got to. Less visibly I have trialled different steels and heat treatments and am pleased with what I have come up with. Importantly I have refined the production process so that I can consistently make the heads the same, I don’t want to be listing individual heads,  I expect to be within 25g of the target weight and 1/4″ in measurements. Apologies for the mash-up of metric and imperial- I always think of edge lengths in inches, but final weights in grams. Still I have customers in Europe and the States so it seems appropriate.

A  satisfying by product of forging accurately to size is that the initial  blank of round bar I start from looks improbably small.

These heads will have an edge length of 6″ ( measured along the cutting edge – is about 5 3/4″ as the crow flies) They will be symmetrically flat ground, the steel and heat treat I am using will hold an edge at 29deg which is much finer than standard  axe grinds, they tend to be a fair bit over 30deg. The tips at heel and toe are fine, they will stand up to sensible use but are not designed to be used to pry with, these are carving axes and these tips are for getting into and out of concave cuts. I prefer to think of these heads as a ‘knife on a stick’,  albeit much prettier hopefully, rather than a jack of all trades tool. I have made the throat quite narrow as I like the dramatic ‘Viking’ look this gives, I have however left it a bit thicker than normal to be sure that strength is maintained, you can see this in the profile picture at the bottom of the page.

The toe is quite pronounced but due to the long cutting edge this is balanced out by the large beard, it makes for an agile head that will shape well but still have enough edge length for planing cuts, the edge is pretty straight which aids both the planing cuts and the more extreme tips.  The weight at 650 is fairly heavy for a carving axe- not far off a GB carver but, but it is certainly not excessive. I may well introduce a scaled down version around 500g

I have put some subtle decoration on the heads, as I mentioned at least a year ago part of the rationale behind this was to reinforce the point that these are not heads bashed out at speed but works I have poured a lot of effort and care into, I enjoy making them and don’t want them to become a huge part of my production schedule. If they do the frisson of excitement I get from an axe making week coming up will be lost. And it was such fun that I went ahead on the dates that I had marked on my calender despite them coinciding with the hottest days of the year- the workshop has never been so hot, which was challenging. I also spent some of this week making the fourth prototype for a larger head that I hope to put into production next, but currently I am struggling to make them using the techniques that I want to at a speed that will make them commercially viable.

I should also say that whilst the carving head may seem expensive at £210  it is from my point of view under priced, I still take too long over them. I could make them quicker but there are so many tweaks and refinements that I feel are necessary to make these the best Axes I have ever made. My hope is that with practice I will speed up to a point that they do become worth making financially, they are fantastic heads and I enjoy forging them, but if I only made these heads I would struggle to stay afloat.  So I will put these up in the next round of back orders, will be really informative seeing how many are ordered.  When they have been made and posted out I will then take stock and see if it will be possible to repeat next month. I certainly hope so.

Axe Forging- Demo and Workshop

This weekend I will be at the Bodgers Ball, its only a bit over an hour down the road, I am pleased not to be spending too long in the van. will set up the forge and make an axe and an Adze, Harry who used to strike for me at the Greenwood Guild will be wielding the sledge again.

May is looking to be my busiest month ever so I will not be setting up a stand at the show, and am really looking forward to a relaxing weekend catching up with friends and family.

The weekend after I will be in London teaching knife making on the Sat and Sun, and on the Mon/ Tues will be doing Axes- and there are still a couple of places left. These usually sell out very quickly so this is rare chance to grab a place while you can. Tom made a great video of the last course we ran.

These courses are really special and being over two days the atmosphere is great, the sense of achievement people get from forming and marrying raw blanks of steel and wood into their own special axe is infectious.

You can book your place Here.

Detail knife handle

After reading a request by a customer for information on how to fit these blades I remembered that I haven’t ever shown how to fit small straight blades so put this together today. As it was spur of the moment thing whilst waiting for some Twca Cams to anneal I didn’t have my camera with me or a finished detail blade but used my phone and found a blank that had been used for hardness testing after heat treat- hence the small impressions on one face.

I used some birch for this handle, it wasn’t fully dry but had been in the workshop for a few weeks in a 1″x 2″ section which is turned out well, dry enough so that it will take a good finish but still enough moisture that it didn’t crack and will tighten onto the tang as it dries later. Ash is also good as is elm, harder woods such as yew seem to be prone to splitting.

I took the pictures for this sequence as I did it, it was all by eye, not marked out on a table. This really can a very quick process. If when you get the handle on it doesn’t line up well split it off and have another go,  you may only be 10 minutes in.

As I general rule I make a handle one finger width wider than my palm. So I cut the birch to length and shaped one end, leaving the other end largely untouched. Then lined up where I wanted the blade to be.

I then marked where I wanted to drill the hole for the tang.


Rather than drill immediately I then used a bradawl to start the hole to be certain the drill wouldn’t wander. I chose a drill bit to give a hole slightly undersize.


The hole was drilled in a press but you could do it freehand, main thing is to be certain that the orientation is good left to right, up and down there is more leeway for error in this blank.  Make sure you drill the slightly deeper that the length of the tang. I then put the drill bit in the hole and used this as a guide to see how well it all lined up. As I have done it this many times is was fine, but if it wasn’t the idea is that you have left enough excess wood in the butt end of the handle to bring everything back into line.


If you are using a cordless drill after drilling you can put it in a vice, put the handle back onto the drill bit and spin the handle slowly whilst holding a marker to the other end, it should scribe a circle with the middle being your centre. This trick works well for lots of instances where you need to drill dead central. As it was all I needed to do was mark the centre on the butt and draw on the rough outline of the handle.


I shaped the handle, including cutting the face that the tang was going into, I left the butt unfinished. The blade was then put in the vice protected by a wrap of cardboard and then it was tapped gently into place.


When I was happy with that is had gone in OK I cleaned up the Butt, no point getting it perfect then marring it by  hammering on it.


Finally I gave the handle a coat of oil and as I wanted to use it for something ground the point to a pyramid to make a bradawl.


Froes

When I made my hazel gate a few weeks back I was reminded that I didn’t have a small froe anymore. As often happens I must have sold it when running low on stock. I find it quite amusing that when  I offer to sell a customer one of my personal tools their eyes light up thinking that these are in some way special.

In a way they are. If I forge a tool and some fault become apparent  that means it won’t be fit for purpose then it will be scrapped, I won’t spend time finishing such a tool. However sometimes when I make a batch of tools something may come to light that means it won’t be sold on this site, sometimes it is just a matter of sizing. I make a bath of 80mm blades and one measures up at 75. These will be sold at shows, that way a customer can be sure of what they are buying.

Other times though an issue will come to light that makes me question a tools strength. It may be forged too thin, I do like my tools to not carry excess bulk but there are limits. I often handle these tools myself and try them out, to see if I can find these limits. I actually have yet to break one, which is pleasing. Other issues include de-laminations in a forge welded tool. I prefer not to sell these, if I do it will only be face to face so I can point out any issues. Regardless everything is guaranteed.

So, back to the Froes. For me there is no doubt that the most efficient way to make a froe is to weld a laser cut blank to a piece of tapered tube. But, this is not a way I prefer to work and wanted to forge myself one in a traditional style, mainly to see if I could. One issue that can effect all froes is the eye join. In machine welded ones they can break, in forge welded ones they can split where the eye is wrapped and the two sides meet, wrought iron resists this splitting a lot better but not completely  and is not a material I work in so the weld was potentially more vulnerable.

I have wanted to forge a blade with a socketed eye for quite some time, but I wanted to avoid the likelihood of the eye opening so tried a new (to me anyway) weld, it was tricky partly due to the shape, but also because when I did decorative work I used to forge weld everyday, now it is very uncommon for me. But I did fairly well I think. Made a pair, then had another go and did another couple.

I will as ever keep the one with the dodgiest weld and sell the others. They won’t be on the site as it is not worth listing something I am unlikely to make again- I can’t see me being able to forge these at a rate that would make them viable. I could arc weld and grind some up that would look very similar and function the same much quicker. Still it was fun to try something new.


First two forged in the end they went a lot easier than I expected.


Final forms for them; I was talking to Alex Yerks about these and sagely proclaimed that a froe should be sharp enough to bite into a log but not cut you.


I decided to put handles on, and in the process cut myself deeper than I have in a long time!  I used  hazel in the round and stained it; this is a favourite for me, lots of variables but if you get it right the results are really good. They ended up looking very much like the tool I envisaged, rough forged and handled but with a bit of delicacy.


Years back I used to help out at a forest school, children learning cleaving used to work in pairs, one holding the froe the other the maul, even with gloves it was dicey at times.  I tend now to either forge the eye slightly offset, or if I am still not happy fit a curved handle to give a little bit more clearance on very short froes.

Awaiting Changes

Don Nalezyty

 An Introduction

If you follow Nic on facebook, you will know that I’ve started helping with the website. Some of you may know me from the spoon carving community, but my profession is in IT. When Nic asked if I’d be interested in supporting the site, I was happy to help out with something that ties together two passions.  (Yes, I’m uber geeky!)

We’ve updated the technology and processes behind the scenes over the last few months. Much of this Nic has talked about here, but it has not really been visible in the shop until Tuesday.  We added a password protected section to the Shop and opened it to folks on the top of the wait list to place back orders. Nic will be working hard to complete these in the next month.

Wait Lists

One more visible change Wednesday was the removal of the old product specific wait lists. Those lists were limited and cumbersome to manage, so we created a new wait list. It is important to us the list is accurate, since it will be used to grant access to the back orders section of the shop. This will happen periodically when Nic is ready to take orders.

As detailed in Tuesday’s post, there was a great deal of effort to clean the wait list, but we would like to make it better. There will be an email going out soon to everyone on the wait list. You should update your information following the instructions in the email. This will verify that you are still interested and waiting for a turn to purchase some of Nic’s blades. I have added a page to the site to allow folks to add their names to the queue. You can find it in the menu under Shop.

This new list combined with password access to the back order shop means that everyone will get an opportunity to order rather than relying upon being online at the right moment and lucky enough to submit an order before all the stock was sold.  Given the long list, folks may have a long wait, but when they reach the front of the queue they’ll have access to the site for 24 hours to complete orders.

We’re both happy with how the last sale went. We hope this new more equitable system will make everyone else happier too.

Back Orders and the Wait List

We have opened a new back order section in the shop and will be taking orders over the next day or two. Before you all race over to the shop and attempt to order, I wanted to give an update on the changes we made and how the process now works, but first we need to briefly cover what’s happening with product wait lists as it’s a big part of the new process.

As previously mentioned, the old wait lists and ordering system had problems.  The new process is relying on a single unified wait list for back order-able items. There were nearly 1600 email addresses on the old product wait lists, which had to be merged, cleaned of duplicates and invalid email addresses. The new list is now down to 650 prioritized emails based on the order in which folks joined the wait lists.  (650 sounds like a lot, but before you lose hope – we suspect a large percentage of these will not result in sales.  We’ll know better in a few days.) This unified wait list is used in the new process outlined below.

Here’s the quick summary of  the new process:

  • The back orders section of the shop is behind a password
  • Emails have gone out to the first block of people on the wait list
    • Instructions on how to order are in the email
    • The password is in the email
    • Passwords expire 24 hours after being sent
  • Those who received emails will have that 24 hours to submit orders, then we will be letting the next block through with a new password.
  • This will continue until I have taken a month’s worth of orders.
  • Back ordered blades should be shipped within a month.

Please note that the sharpening section is not back ordered nor  password protected, so these are normally shipped the next day. If however you order sharpening kit alongside back ordered blades then the whole order will be shipped when the blades are completed.

I am also getting daily, sometimes hourly requests for axes and adzes or to be put on wait list for these.  Currently the wait list only covers back order-able blades, but once we have this system working well I may start to include these in a separate list. Any new information will be put up on here.

Powered by WordPress. Designed by Woo Themes